
---
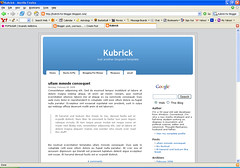
This was the template I started with for the new look of my blog. The template had three images: the header image, the footer image, the background image, and the blog body image. Since I wasn't really very particular about the color blue, I decided to change the colors to shades of purple, and of course changed the header to an image I can call my own.
I worked with these pictures:


And started with this:
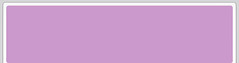
The original came with the template, and I just recolored the blue part into a violet shade using the Paint Bucket tool of Photoshop.
I opened everything at Photoshop:
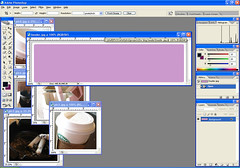
Then I dragged a picture into the header image. [Or what you can do is go to the picture you want to put into the header image, press Ctrl-A, then Ctrl-C. Then go to the header image then press Ctrl-V. What just happened? You just copied and pasted an image to another image! :)]
This is how the header image in Photoshop will now look like:
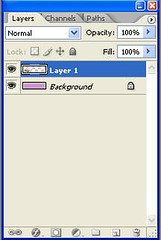
This is how the Layers palette (which is situated at the bottom right of the screen) should look like. What are layers? Maybe take a few minutes (or hours) to read Photoshop Layers explained. Anyways, the Layers palette (*turo sa left) is indicating that a layer (which is the first picture I used) is on top of the background pic (which is the header pic).
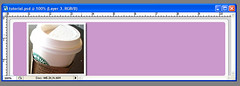
So, how did I tilt, resize the pictures already on top of my header pic? I made sure I was working on the correct layer, then I pressed Ctrl-T for Free Transform.
This is how the toolbar would look like:

X stands for the position of the picture along the X-axis, Y along the Y-axis, W stands for percentage of the width, H for the percentage of the height. The one after H that looks like a triangle stands for the degree of tilt. The H and V stands for horizontal and vertical skew, respectively.
[edit] You can use the toolbar or use your mouse to tilt and resize. I usually use my mouse to tilt, then use the toolbar to resize para proportional yung resize talaga.
One can resize, and tilt to one's heart's content until you get the desired effect. If you don't want to save the tilting and resizing, press ESC. If you want to save it, press Enter, or double-click on the "transformed" layer. Working in layers means that you are just modifying that picture, and hindi masasama sa transformation yung background picture.
To add more pictures, just drag everything on the header pic. Again, since we are using layers, you'll only be transforming the layer you're working on.
If you want to change the "layering", that is you want some other image to be on top of another image, then just change the position of the layers on the Layers palette by dragging and dropping.
Save the Photoshop file as psd to preserve the layers. Now if you're satisfied with what you've done, save it as a jpeg file.
I uploaded the final jpeg header image into my Photobucket account. In the Kubric for Blogger template, I changed the URL for the header image to the URL of my header image in Photobucket.
Sunshineandraindrops, for your template, insert the img tag of your header image inside the header div where you put your blog title. You can opt not to show the blog title anymore :)
----
I hope this makes sense, waaaah! Ang hirap pala gumawa ng tutorial hahahah :))
I learned Photoshop on my own, and I started with MyJanee's tutorials. Doing this project really helped me understand layering, free transforms and all the other basic Photoshop functions.
At first, Photoshop looks really daunting, but it really is easy to use, and there are tons of tutorials on the net!
For any questions, email missyosigirl at gmail dot com :)
hey there, thanks so so so so much for this mini-tutorial... i wonder, with your hectic schedule, AND you're a wife & mom, AND you're a reader, AND you're an arts-and-craftser = = =
ReplyDeletewhat alternate reality do you transmigrate to in order to get all the time to blog & surf the net????
hehehe... blog on, dear writer! you're definitely bookmarked on my computer!
sandy
hi sandy! no, there was no alternate reality... my daughter spent the weekend at my parents' house so i had lots of extra time to do this tutorial hahahah :)
ReplyDeleteand you're so patient doing all these. :) and really nice for posting a tutorial.
ReplyDeletethanks shelley... this will be useful. as of right now i'm experimenting on new changes to layout :)
ReplyDelete@north - those online tutorials helped me a lot, so i'm hoping this tutorial would help out too :)
ReplyDelete@carlo - go go go :) good luck!
Wow. Thank you thank you!!! :)
ReplyDeleteActually I've tried that with Photoshop, but
1. I dont know which size of header I should use...
2. one last set of question... how to change the size of the margins and how to make the background white for the body?
:) sorry po kung marame nang tanong, sagot ka na lan po pag may time ka :)
thank you so much!!!!!!!!!
hmm. so step by step ba ito? hehe. :)
ReplyDeletewaaah alam mo na un shelley!! mishu na!! hehe.
magpapalit ba ako ng blog header?
hi shell,
ReplyDeletenaku buti na lang nag-post ka nito. actually we've used photoshop before for our std's. but since di talaga kami marunong, nakalimutan namin ulit gamitin...hahaha!. thank you! thank you! for posting. at least nagkaron ako ng idea.
@sunshine - maximum width of the image should be the width of your header div. according to your template, it's 660px :)
ReplyDeletewait, clarify ko lang, san yung margins and background? sa template mo or sa gagawin mong header? :)
@drei - yes, magpalit ka na ng header mo :P
@nette - natuto ako magphotoshop dahil din sa save the dates ko! :D pero natuwa ako sobra so kinarir ko na talaga hehe :D